Hello ladies to the last instalment to our “how-to” series on getting rid of those dark circles under your eyes. But before we get into covering them up, remember that the best way to do it is still to identify the cause, apply the best solution, get the skin care with the right formulation, and finally learn camouflage. This article teaches you further how to even out your skin tone while you’re waiting for your skin care regimen to kick in. For our purpose today, we’re going to use a concealer as a corrector. Remember our earlier article?
So for this article, let’s focus on daily wear – something you can do to make sure that your day look wouldn’t be compromised by your hyperpigmentation. For the day look, you’d need to consider the weather – if it’s cool you can work on thicker formulations and if it’s a bit warm, work on a lighter more silicon-based products that sits on your skin and does not run when you perspire. Then choose your colours depending on the colour of your hyperpigmentation and how much time you’d be under the sun based on our last article. Then you’re good to go.
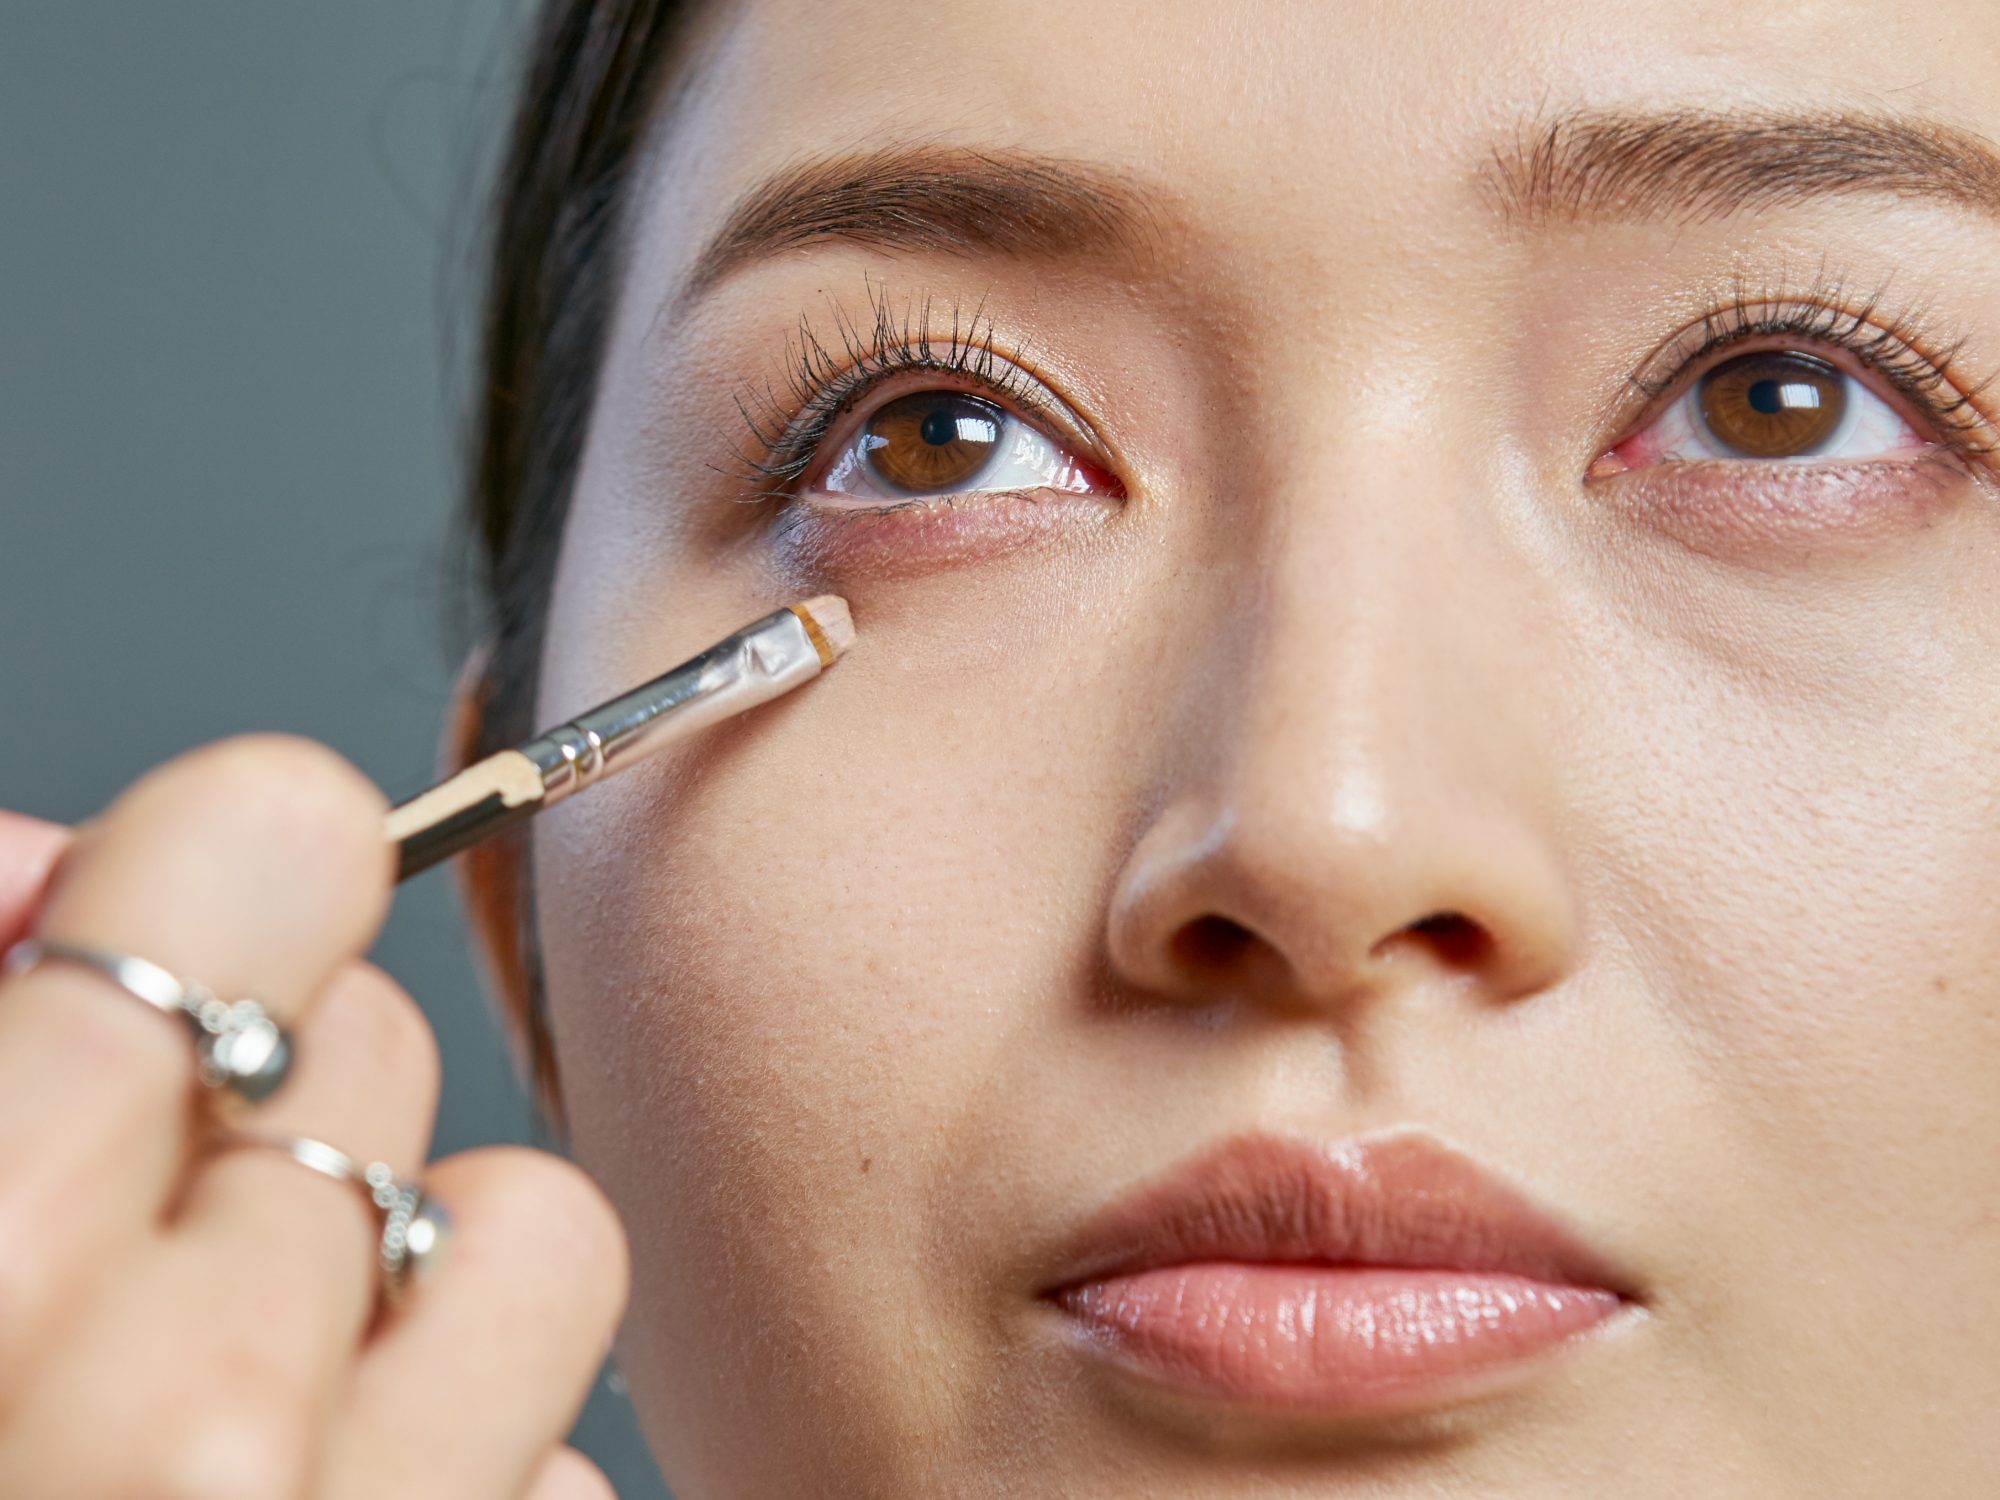
As always, begin with the triumvirate of clear skin – cleanse-tone-moisturize. Using the make-up technique called camouflaging, apply a small amount of the colour corrector on your dark circle. You can either use a synthetic brush or just your finger. The synthetic brush allows you to lightly sweep the product into the ridges of your under eye making it look more natural. When applying with your fingers, use your ring finger to lightly pat the product on your skin – this prevents further bruising on this area when too much force is applied. The natural warmth from your finger also allows the product to be absorbed better. Either way, the look that we’re gunning for is natural. A little caveat though, some products may have its own applicator. This somehow gets you to apply more of the product than what you actually need. If this is the case, transfer some of the product to your brush or finger before you apply it on your skin.
Concealer
image c/o Real Simple
As soon as you apply your product, you will see how the colour “cancels” out the hyperpigmentation. Remember to begin with a small amount and then build from there – its better to build than to erase because it makes the make-up look messy. After applying the camouflage, it would look at little bit more like your skin. Apply your regular foundation now by dabbing the product on the corrected area to prevent the product from “moving.” Some make-up artist would put powder immediately after putting on the corrector but I think that it only causes more creasing when there’s a build-up of powder on the skin. Dabbing the foundation allows for better absorption into the skin making it look more natural. Again, use the product sparingly to prevent you from looking too patchy.
It takes a lot of practice so don’t get discouraged on your first few tries. Observe how your skin reacts to your chosen product and feel free to try out other ones if you feel that it’s not working for you. Don’t throw those products away because our skin responds to them depending on the different scenarios around them – weather, room temperature, activity etc.
So get on this new adventure and tell us about your experience! You’ll never know, you might have some valuable information that will help someone who can relate to your experience! So write to us, message us, text us and let’s keep in touch!
Till next week!